

This was a shared between project with Martin Martin and I. It was a Physical Computing final for both of us, and also an Computational Media final for me. This blog will focus on the ICM aspects of the project. For the PCOMP take on the project, visit Martin’s blog (link here)
Santa’s Zombie Boot Camp
p5 Sketch (link here)
This project was tough. I had an idea of what I wanted, and I didn’t think it would be too far from what we had for the midterm (link here) but I was wrong. I decided to remove the jump mechanic from the game because it didn’t make too much sense for our zombie to jump, and we added a Santa theme to the game which called for almost a complete redesign.
Getting the physical components together was frustrating, but not overly difficult. If anything it was just a little more time consuming. Thinking that most of the work would be on the physical side, we didn’t leave too much time for the coding. This was a mistake. I think with more time and less pressure, I may have been able to work my way out of coding challenges on my own. Luckily, we have people at ITP like Max Da Silva and Aditya Jain. They were immensely helpful in getting this game to the place that it is at.
Something that helped this time was just making a list of my goals for the code. There were a lot of small tasks to accomplish, so having them laid out in a checklist helped me keep from feeling overwhelmed.
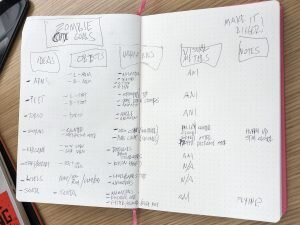
A List of Coding Goals for the game that breaks up the functions and addresses the general scope of the project
One of the issues that I ran into was getting the gifts to spawn when the Zombie got close enough to Santa. I was able to define the range in the code and even have it print “gift delivered!” every time the objective was met, but I couldn’t figure out how to make the pictures of presents show up a that point. Aditya helped me create an array for that and just clean up the experience overall.
Aditya also helped me figure out an issue with our start button and foot stomps. With my code, every time either of those sensors were activated, they would do so on the draw loop in a rapid-fire succession. I didn’t know how to get around that, so Aditya showed me how to use a throttle to have those sensors write once every second, which was key in having the game run properly.
Max helped us get the serial communication into our code. We had most of it there from our midterm, but we were having trouble with our gyroscope when we added it in. Max helped clean up our code to make that work.
Screen Recording of Santa’s Zombie Boot Camp
Alvaro playing Santa’s Zombie Boot Camp


